

About The Project
The Problem
People with diverse abilities are often overlooked in the design and development of everyday products. For example, many blood pressure monitors lack features that support users with visual impairments, such as sufficiently large text, high-contrast button colours, and clear, accessible instructions. These design limitations can make products difficult to use independently and highlight the importance of incorporating accessibility into the design process.
The Solution
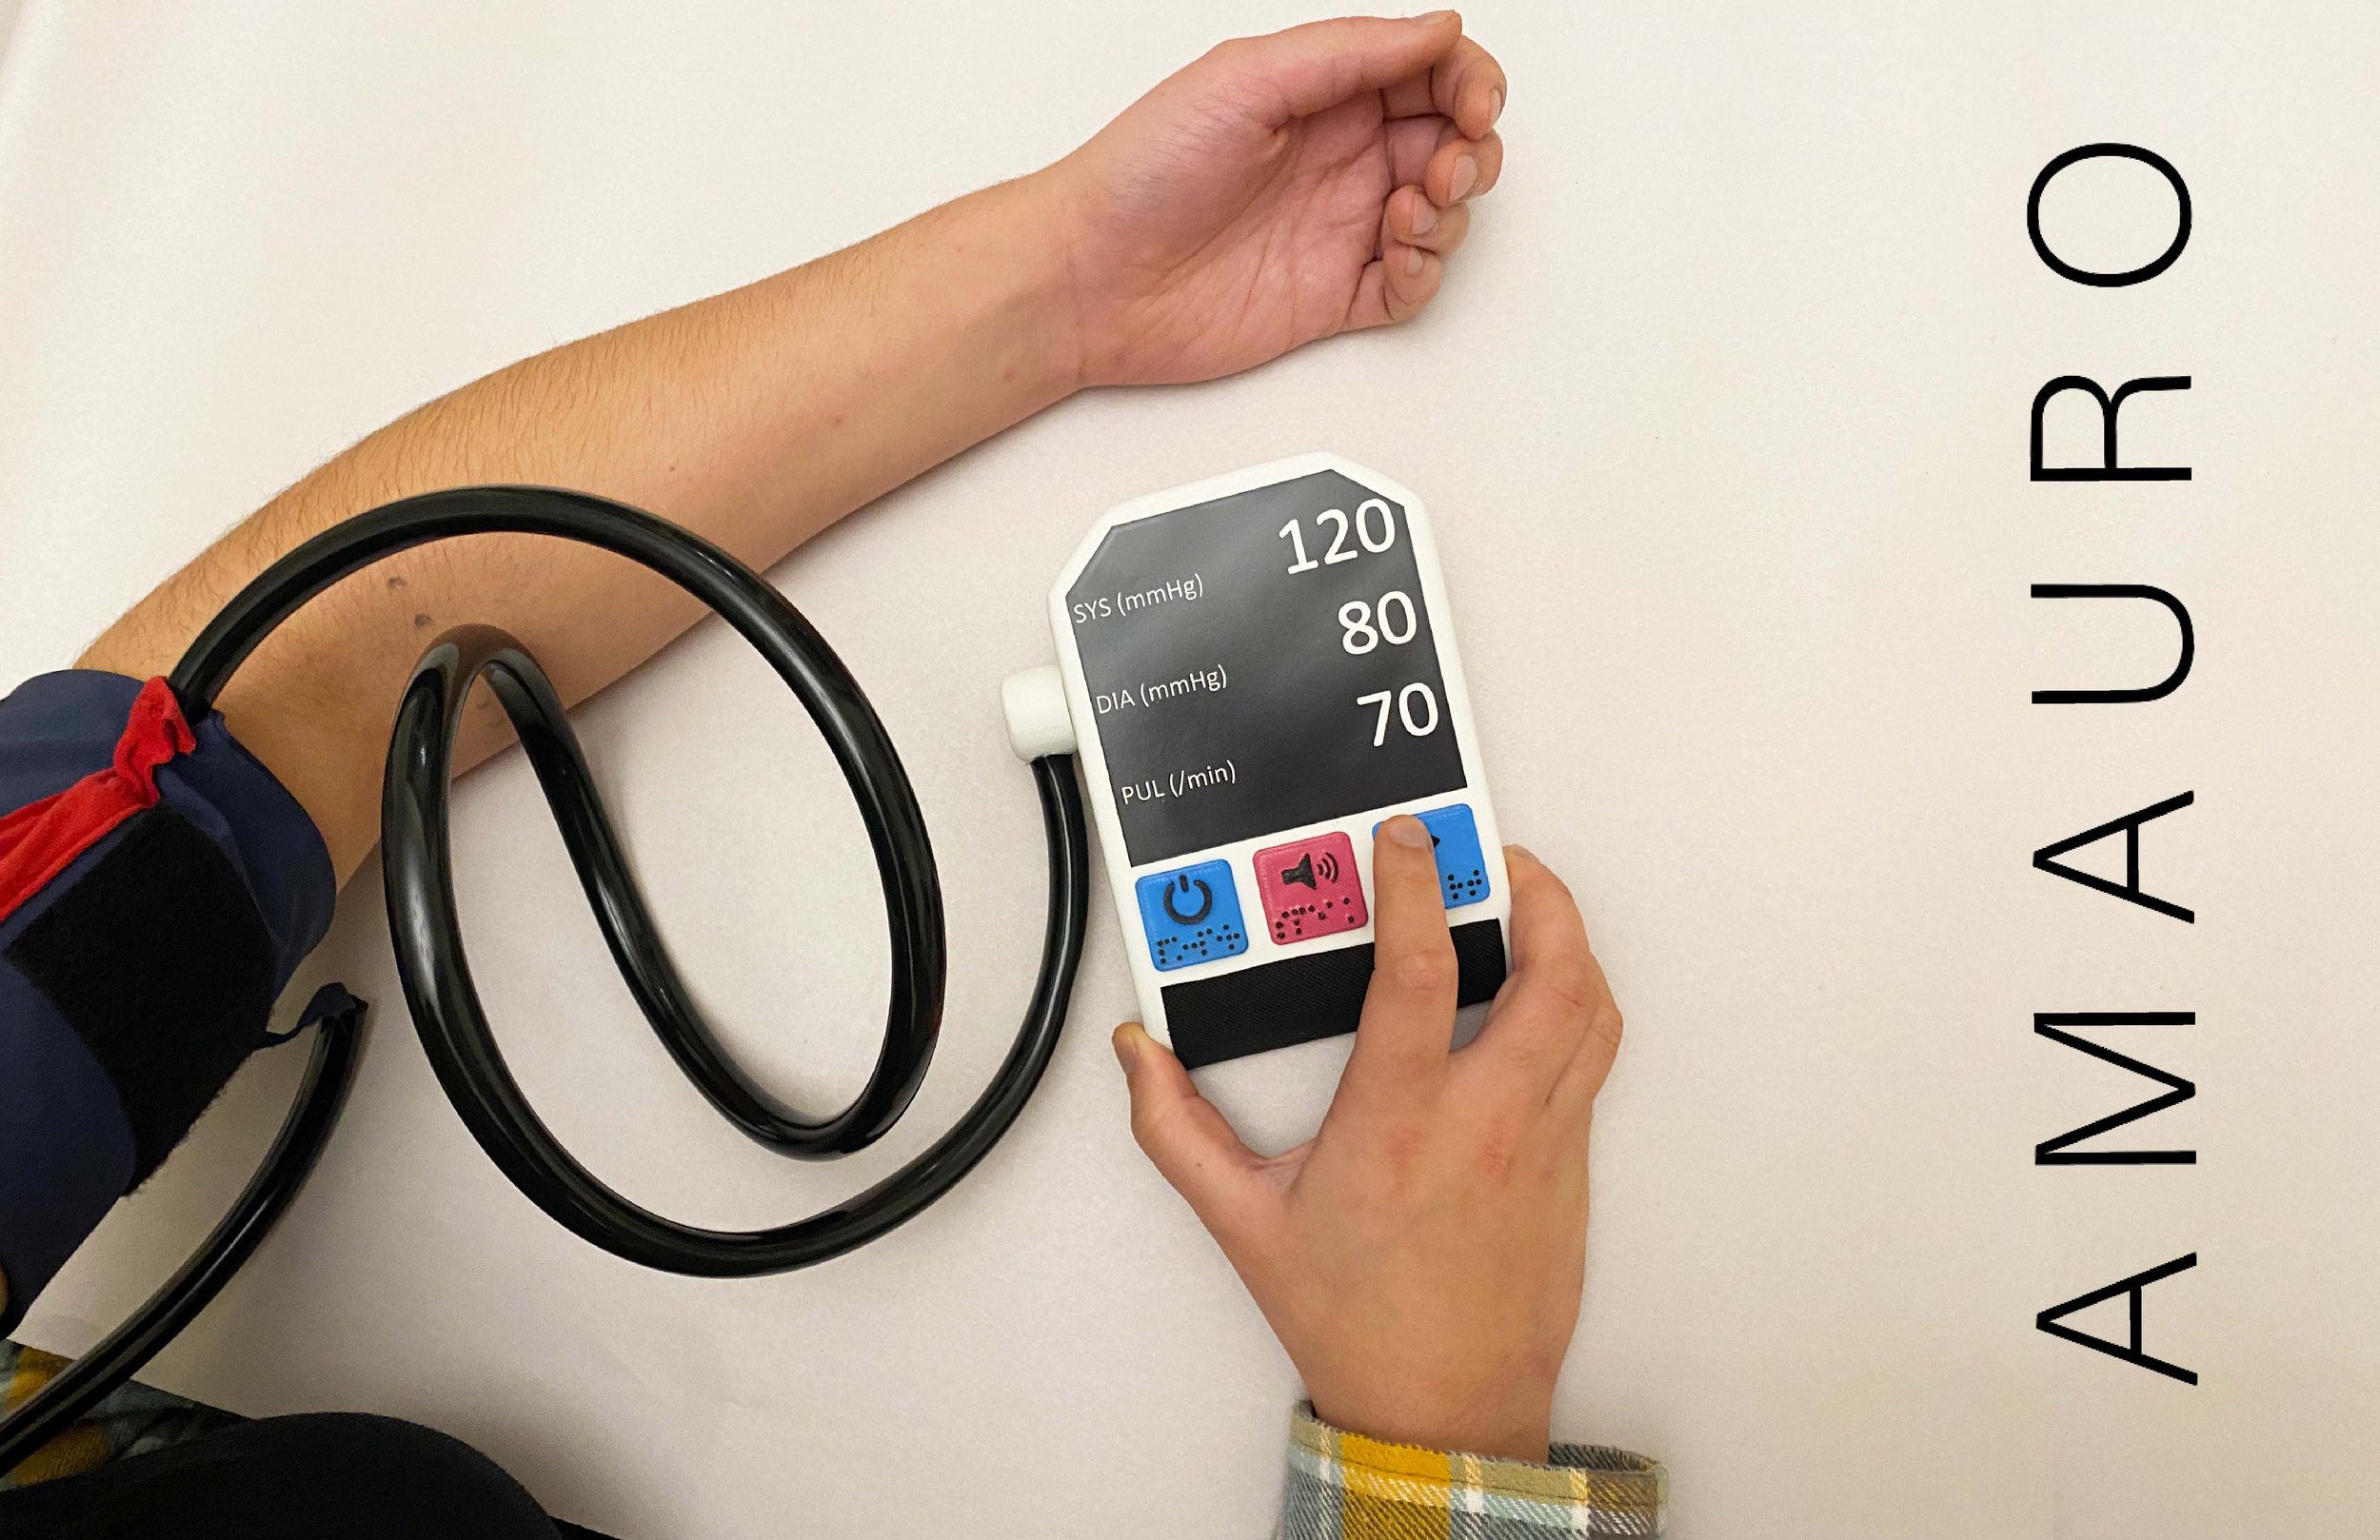
Amauro is a functional, efficient, and accessible blood pressure monitor designed to help people with visual impairments take their blood pressure with ease. While the primary target market is people with visual impairments, Amauro can be used by anyone. A range of tactile and audio features, including Braille, raised button symbols, a textured battery cartridge, audible instructions, and fabric indicators on the cuff, helps users navigate the monitor independently and understand the purpose of each feature. Together, these features make Amauro a more inclusive and accessible blood pressure monitor for people with visual impairments.
Basic Research
-

Manual Monitor
Uses either a mercury or aneroid pressure gauge.
Requires manual inflation of the cuff using a hand pump.
Requires the user to listen for blood flow, typically with a stethoscope.
-

Automated Monitor
Commonly used in homes, clinics, and hospitals.
Automatically inflates the cuff and calculates the blood pressure reading.
Powered electronically using batteries or an electrical outlet.
-

Cuffless Monitor
Commonly incorporated into smartwatches and other wearable devices.
Uses sensors and algorithms to estimate blood pressure without an inflatable cuff.
An emerging technology, with accuracy and reliability varying between devices.
Tear Down Research
-
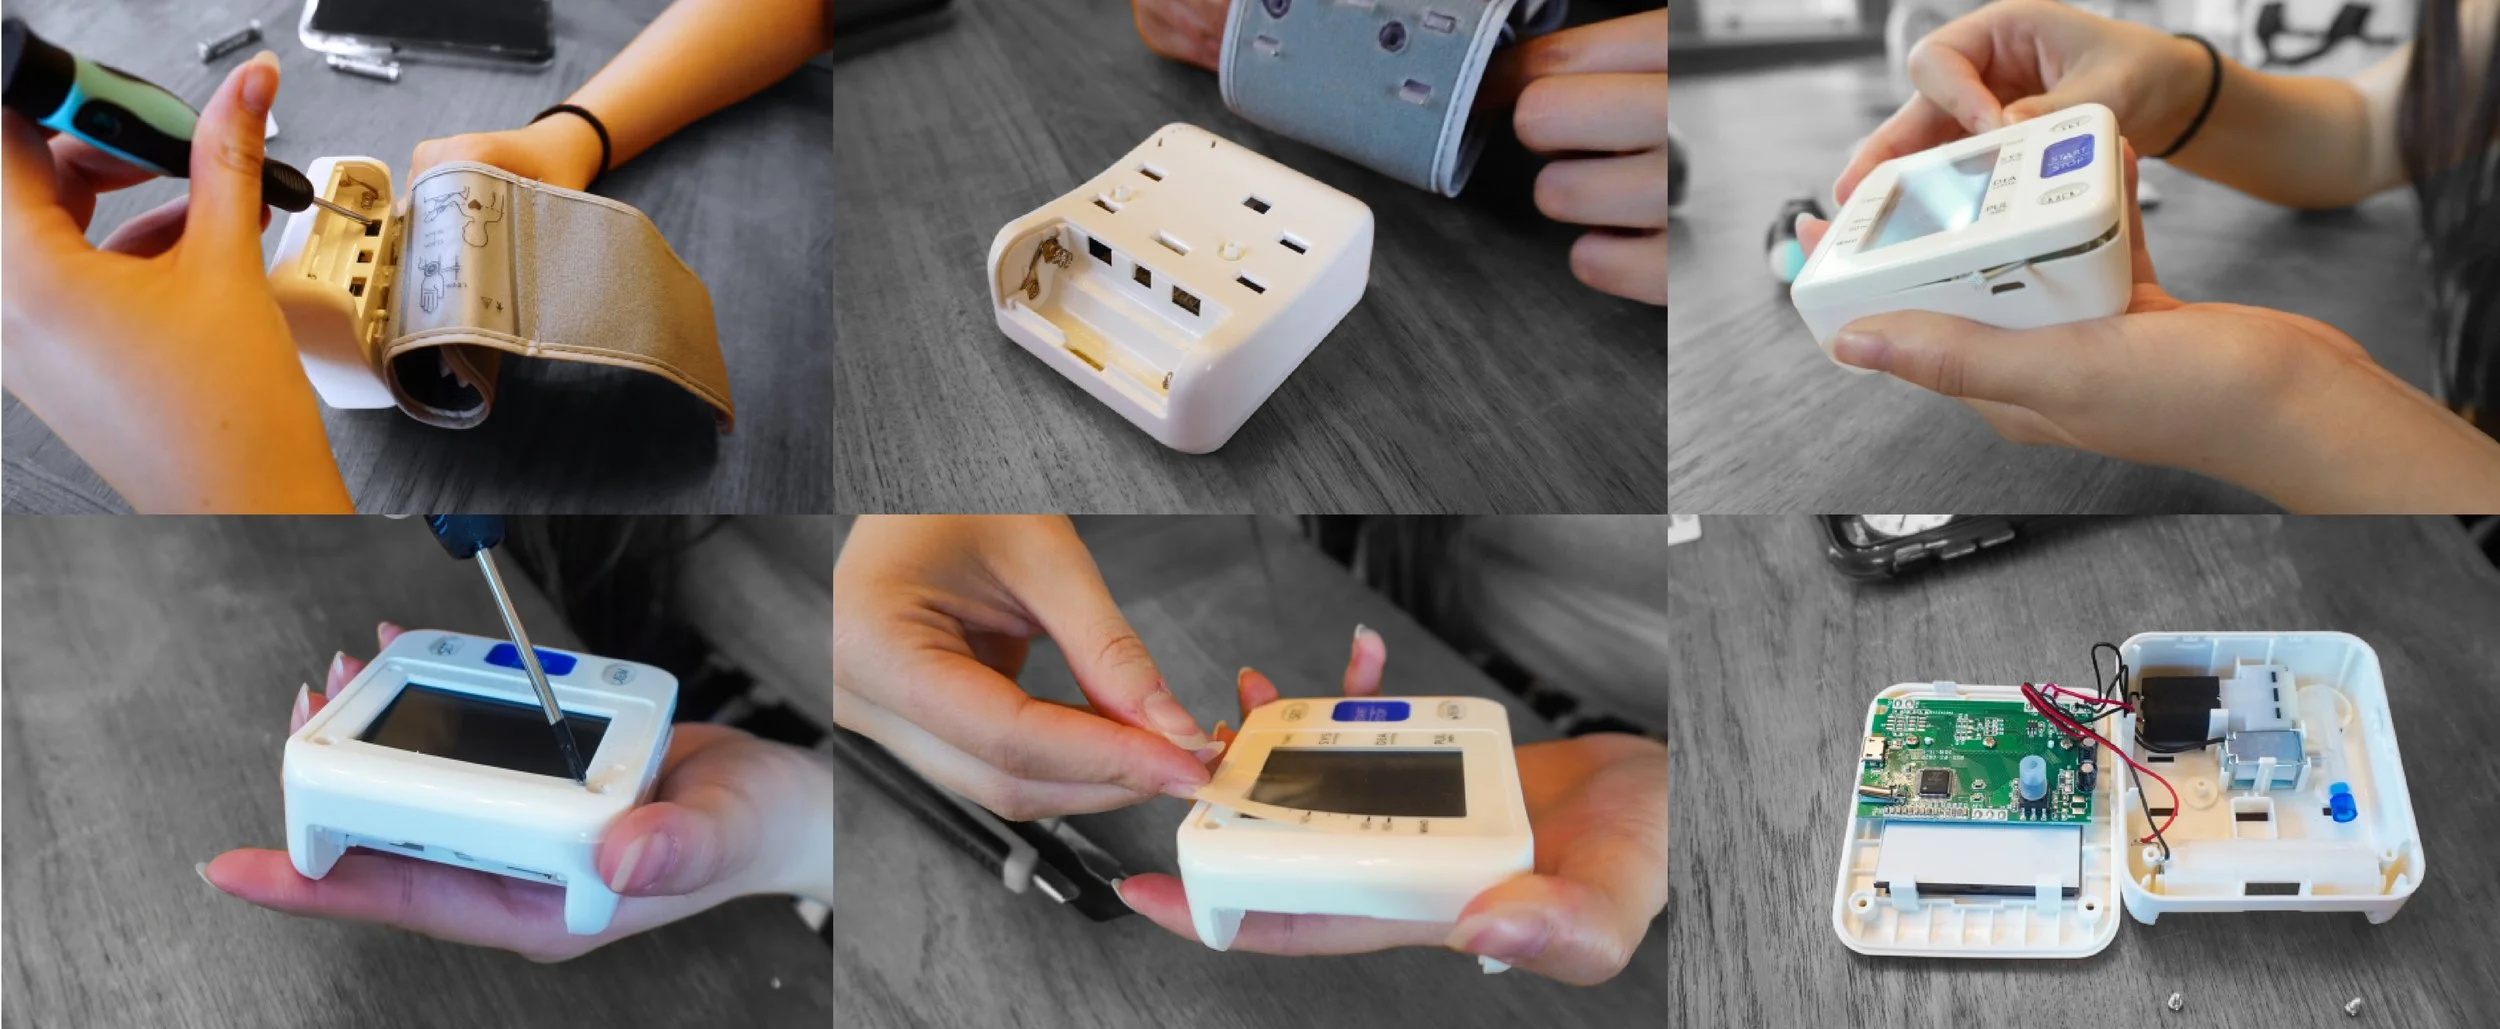
External Tear Down
-

External Tear Down

Some Notable Features
1. Plastic housing
2. Wrist band
3. Circuit board
4. Screen
5. Motor pump
6. Solenoid
7. One-way valve
User Testing
-

After putting on the safety goggles covered with masking tape to simulate visual impairment, users immediately began exploring the machine through touch. They felt along the surface to locate the buttons and other features, pressing them to determine their functions without relying on visual cues.
-

Users would typically begin by pressing the button on the far left. Some users identified the power symbol by touch and used it as an indicator, while others pressed the buttons without first identifying their purpose. User testing feedback suggested that users would rely more heavily on touch to locate the buttons if they were more prominent and easier to distinguish from the surrounding surface.
-

After pressing each button, users received the corresponding verbal instructions, using a prepared script to simulate the product’s built-in speaker system. They then followed the instructions to place the cuff on their arm, activate the test, and complete the remaining steps before removing the cuff.
Ideation
-
Layout

-
Shape

-
Cuff

Features

Screen
Originally, I intended to use a fully custom display, but this would have significantly increased the overall cost. After further research, I decided to use custom-cut plastic paired with a smaller LCD (liquid crystal display) screen positioned behind it. This approach keeps the cost relatively low while maintaining a high-quality appearance. The main limitation is that the plastic LCD cover is slightly larger on the top, meaning the screen could appear too short when the display is on. To address this, the text and results will be displayed in white on a black background, allowing the non-illuminated areas to blend seamlessly with the display and create a more refined appearance.

Battery Pack
For the power source, I used two AA batteries. To make this part of the product accessible without relying on audible instructions, I designed the batteries to pop out of the machine when the plastic battery holder is pressed and clicked. The external push point features textured plastic, making it easier for users to identify through touch. Inside the holder, the classic springs found in most battery compartments help indicate the correct orientation of the batteries. The same push-and-click mechanism is used to securely put the battery pack back into the machine.

Buttons
Using the website Coolors.co, I selected the ideal shades and colours for the product, keeping colour accessibility and colour blindness in mind. The website allowed me to preview how the chosen colours would appear to users with different forms of colour blindness. To ensure the colours were accessible and provided sufficient contrast against the black symbols, I used ColourContrast.cc to verify that the selected shades met appropriate accessibility standards. In addition to colour and visual indicators, I incorporated Braille and textured symbols, as not all visually impaired users can read Braille. This provides multiple forms of tactile symbolism necessary to a positive user experience.

Cuff
I used the same website, Coolors.co, to select the two colours used on the cuff. The red shade serves as an accent colour to help users identify where the cuff should be positioned on the upper arm. This section of the cuff is also made from significantly softer cotton fabric to provide an additional tactile indicator, while the remainder of the cuff is made from nylon. The cuff is permanently attached to the machine to simplify the user experience and prevent it from becoming misplaced. A handle, which is larger than the D-ring, was also incorporated to reduce the likelihood of the cuff slipping out of the ring and to make it easier for users to locate and handle through touch.
Final Model Construction

Machine Construction
I used a variety of fabrication techniques to construct the final model. The main body of the machine is made from high-density foam, shaped using a band saw and refined using a belt sander and hand sanding. I then applied layers of DryDex and Gesso, sanding between each layer to create a smooth, plastic-like exterior finish. The screen was printed on high-gloss cardstock, while the speaker was represented using fabric for an accurate look and texture. The buttons were designed in SolidWorks, 3D printed, and painted by hand. The parting line was created using thin strips of tape coated with white paint and carefully applied to the model. The battery compartment on the back of the machine was constructed using the same technique.

Cuff Construction
For the cuff, I used flexible tubing to connect the cuff to the machine and to create the handle. The main cuff material is nylon, chosen for its lack of stretch, while the red tactile indicator is made from cotton to provide a softer and distinguishable texture. Velcro is used to secure the cuff in place during testing. The D-ring was fabricated from acrylic rod and shaped using a heat-strip machine with a foam jig to achieve the precise bends.